I have always been a believer in using ski screws for the touring bracket and heel lifters on a splitboard. It is less work and a little bit lighter than using t-nuts.
But I have recently experienced problems with a DIY split where I ripped out a touring bracket in tour mode.
Depending on the terrain, this can leave you with the need to ride in ride mode with your ski poles out or in the worse case scenario boot packing out of the woods. When splitboarding it is important that your touring brackets are always working. Split skiing is always useful. If it wasn't useful then we wouldn't be cutting boards in half.
Anyway, here is a little photo tutorial for t-nutting your board. I only show how to t-nut your touring bracket, but you can apply these methods to your violie-DIY-split kit or to my preferred method of putting in multiple t-nuts for a universal puck set up.
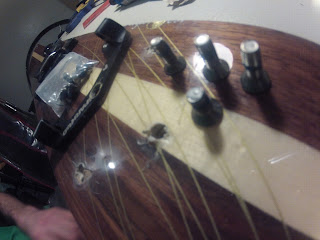
I already used the Voile template for mounting the touring bracket with ski screws, so the holes were already in existence. Here are some useful tools. Left to right: 3/4 inch wood bit. Don't know the width of the drill bit (see below). I used a coned dremmel bit and a caliper for measuring. Not shown are the touring bracket, some m6 t-nuts, some m6 bolts and a palm sander. Plus your stuff for waxing the board when you are done with this whole process..
3/4 t-nut and a 3/4 bit.
Using the caliper on the upper section of the t-nut. That is the part of the t-nut that you will need to fit through the hole in the board and sit flush with the top sheet.
Measuring the bit that will work.
Used the dremmel bit to clean up the holes where the ski screws ripped out.
Commitment time. Make sure that you try and drill straight down.
Oh, snap there are holes in my board.
Flip it over and use the 3/4 bit to drill out the area for the bottom of the t-nuts. There are two important parts to this step:
1. Make sure that you slow down or stop drilling after passing through the base of the board. Once you hit the wood the bit is going to rip into the wood or poplar core a lot easier. Make sure to not put weight on your drill. Let the bit do the work for you. Even if it takes longer.
2. Flip you t-nut bottom side down into your holes to see how deep it is sitting in the hole. You need to have the base above the edges of the t-nut. This is important so that your epoxy has some area to grab and exist in the board.
Not a great photo, but you can see the base sticking up above the upper right edge of the t-nut.

\
It helps to have an m6 bot for setting the t-nuts into the holes. Just thread the m6 bolt into the bottom of your t-nut and then give it some firm taps with the hammer. You can also put epoxy into the holes before you set the t-nuts. Just make sure that if you do put epoxy in the holes that you don't get any into the threads of the t-nuts.
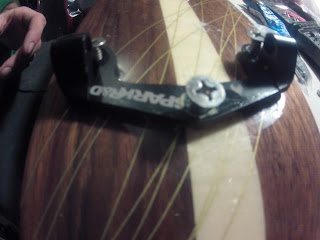
Then line up your bracket.
Screw in you m6 bolts
They will pull the t-nuts in nice and tight into the bottom of the board.
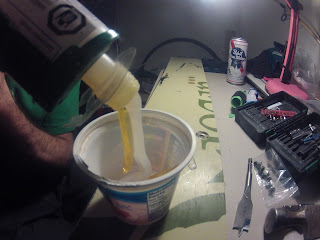
I used this Six 10 boat epoxy. Everyone uses G-flex but this stuff sets up a little bit quicker.
Make sure you have a mixing container you can toss along with a some kind of pop-sickle stick. I used a plastic fork that I broke the fork part off of.
This stuff comes in a caulking tube where you can get a nice even distribution.

\
It is useful to tape over the bottom of the t-nut holes.
Sweet! Let it set up for at least 48 hours.
Having a palm sander is super useful. Start with a more aggressive grit of sandpaper and then move onto a finishing grit when you get close to the board base.
Use a sharp knife to chip around the 3/4 inch hole that you drilled out.
I've found this more useful than cutting into the epoxy sideways with a regular razor. Don't worry about cutting your base because it should be tough. Finish sanding with the finishing grit sandpaper. You should be able to slid you finger over the holes and feel the the smoothness between the base and the set-up-epoxy.
When you are done you will have to wax your base.
Hope this is helpful. If not you can drop me a comment. I've put three days and about 3000 plus vert on those t-nuts since I put them in. And I tend to drop the knee pretty hard on many of my downhill split ski turns.


